
Heads up: this post contains affiliate links. If you buy through one, we may earn a small commission at no extra cost to you. As an Amazon Associate, we earn from qualifying purchases.
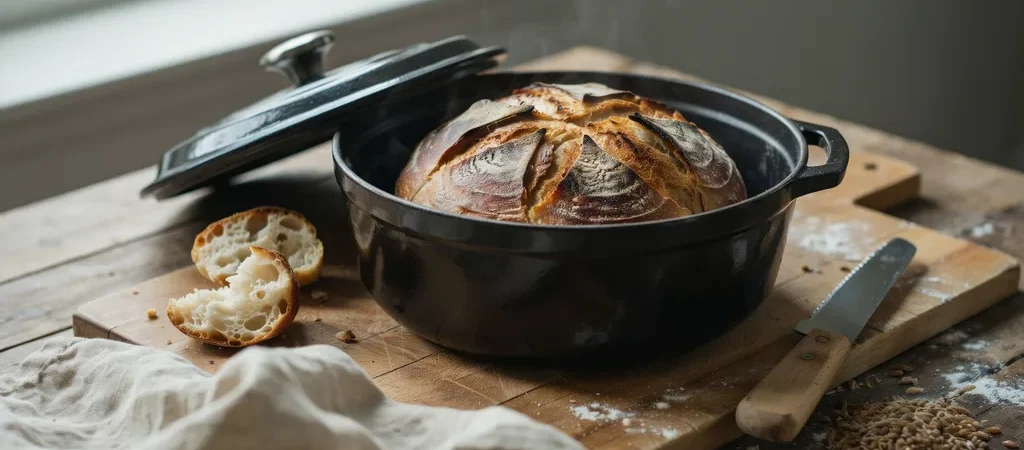
⚡ Quick Answer: To make no-knead Dutch oven bread, stir flour, salt, yeast, and water into a shaggy dough and let it rise 12–18 hours, shape it into a ball, then bake in a preheated, very hot (about 450°F) covered Dutch oven for 30 minutes covered and 12–15 minutes uncovered, until the crust is deep golden and the loaf sounds hollow when tapped.
Fresh bread at camp sounds like a fantasy, but a Dutch oven turns it into a four-ingredient reality — no kneading, no mixer, no bread machine. The dough does its work overnight while you sleep, and the heavy cast iron pot traps steam to create a crackly, bakery-style crust with a chewy, open crumb inside.
This is the famous no-knead method adapted for coals. The one non-negotiable step is preheating the empty Dutch oven until it is blazing hot before the dough goes in — that initial blast of heat is what gives the loaf its dramatic crust and rise. Here is the whole process, timed for camp.
Why a Preheated Pot Makes the Crust
A wet, slack dough plus a screaming-hot covered pot is the secret behind artisan bread. The trapped steam released by the dough keeps the surface soft long enough for the loaf to expand fully, then the intense heat sets it into a shattering crust. You need high heat — around 450°F, which for a 12-inch Dutch oven means roughly 25 coals on the lid and 12 underneath. Because the pot must be preheated empty, use heat-resistant gloves and lower the dough in on a parchment sling to avoid burns.
🥩 Ingredients
Yield: 1 loaf (8-10 slices) • Prep: 15 min • Cook: 45 min • Dutch oven: 10 or 12-inch, deep
- 3 cups (about 400 g) all-purpose or bread flour, plus more for dusting
- 1¼ tsp salt
- ½ tsp instant or active dry yeast
- 1½ cups warm water (not hot)
- Cornmeal or extra flour, for dusting
🔥 Instructions
- In a large bowl, whisk together the flour, salt, and yeast. Pour in the warm water and stir with a spoon just until a shaggy, sticky dough forms with no dry flour left. Do not knead.
- Cover the bowl and let it rise at room temperature for 12–18 hours, until the surface is dotted with bubbles and the dough has more than doubled. This long, slow rise builds all the flavor — start it the night before.
- Turn the dough out onto a well-floured surface. With floured hands, fold it over itself four or five times and shape it into a rough ball. Set it seam-side down on a sheet of parchment paper, cover loosely, and let it rest 30–45 minutes.
- Meanwhile, light about 30 charcoal briquettes. Once ashed over, arrange roughly 25 on the lid and 12 under the empty, covered Dutch oven and preheat it for 20–30 minutes until it is very hot. A hot pot is essential — do not skip this.
- Wearing heat-resistant gloves, carefully remove the lid. Lift the dough by the edges of the parchment and lower it, parchment and all, into the hot pot. Cover immediately.
- Bake covered for 30 minutes. The steam released by the dough inside the sealed pot creates the crust, so resist the urge to peek.
- Remove the lid and bake 12–15 minutes more to brown the top, adding a few fresh coals to the lid if it is not coloring. The loaf is done when the crust is deep golden and it sounds hollow when tapped on the bottom — an internal temperature of 200–210°F confirms it.
- Lift the bread out by the parchment and set it on a rack or cutting board. Let it cool for at least 20 minutes before slicing — cutting too early makes the crumb gummy.
Tips & Variations
Make it your own: Fold in a cup of shredded cheddar and a handful of chopped jalapeño, or rosemary and cracked pepper, when you shape the dough. Faster rise: In a pinch, use 1½ teaspoons of yeast and let it rise just 2–3 hours in a warm spot — the flavor is milder but still excellent. Deep pot helps: A taller Dutch oven gives the loaf room to rise; a shallow camp oven still works but yields a flatter round. Home oven: Preheat the covered pot at 450°F for 30 minutes, bake covered 30 minutes, then uncovered 12–15 minutes.
Recommended Gear

- SAY GOODBYE TO BURNS! At 14” inches long, our BBQ gloves better protect fingers, hands and wrists from burns. And Our co…
- PRO DESIGN&COMFORTABLE!Texture on the surface of the waterproof gloves provides a NON-SLIP protection, perfect for handi…
- EASY TO CLEAN AND STORE-No matter how sticky or greasy they get,the non-slip and waterproof GRILL gloves easily wash cle…

- GREAT FOR CAMPING – Long legs & handles let this cast iron Dutch oven with lid sit OR hang over a fire. This outdoor coo…
- CAST IRON BENEFITS – Durable, pre-seasoned, & easy to maintain – that’s the magic of this Dutch oven pot with lid. Cast …
- DUAL-FUNCTION LID – This camp Dutch oven is a multiuse hero – the lid doubles as a skillet of this large cast iron pot, …

- YOUR NEW GO-TO DUTCH OVEN LINERS: The Lodge Dutch Oven Liners make camp cooking cleanup easier than ever. Made of 100% b…
- WHAT’S COMPATIBILE? This dutch oven liner pairs perfectly with items such as the Lodge 6 Quart/ 12 Inch Camp Dutch Oven,…
- FAMILY-OWNED. Lodge is more than just a business; it is a family. The Lodge family founded the company in 1896, and they…
Frequently Asked Questions
Why does no-knead bread need such a long rise?
Skipping the kneading means the dough develops its gluten structure slowly, on its own, during a 12–18 hour rest. That long fermentation also produces the complex, slightly tangy flavor that makes artisan bread special. It is hands-off time, not work time — mix it before bed and bake it in the morning.
Do I really have to preheat the Dutch oven?
Yes — it is the single most important step. Lowering the dough into a blazing-hot pot gives an immediate burst of oven spring (rise) and sets the crust, exactly like a professional steam-injected bakery oven. Baking in a cold pot produces a pale, dense, flat loaf.
How do I know when the bread is done?
Two tests: the crust should be deep golden brown, and the loaf should sound hollow when you tap the bottom. For certainty, an instant-read thermometer inserted into the center should read 200–210°F. Always let it cool at least 20 minutes before slicing so the crumb can set.

Written by Jake Miller · Camping & Gear
Jake grew up pitching tents before he could drive and has spent 15+ years camping, car-camping, and gear-testing his way across the country. If it can be cooked over a fire or packed into a trunk, he has an opinion on it.