
Heads up: this post contains affiliate links. If you buy through one, we may earn a small commission at no extra cost to you. As an Amazon Associate, we earn from qualifying purchases.
⚡ Quick Answer: Rinse and fully dry the bladder after every trip. For a deep clean, use hot soapy water or a cleaning tablet, scrub the reservoir and hose with a brush kit, rinse thoroughly, then dry it completely with the bladder propped open. If it is already mouldy, a dilute bleach soak followed by a long rinse will save it. Store it in the freezer between trips and it will never grow anything.
Nearly everyone who buys a hydration bladder eventually finds something growing in it. The reason is simple: it is a dark, damp, sealed plastic bag that gets put away wet. The fix is equally simple, and most of it is about drying rather than scrubbing.
The after-every-trip routine, two minutes
- Empty the reservoir and the hose completely. Hold the bite valve open and blow the hose clear.
- Rinse with warm water. If you only ever put plain water in it, that is enough.
- Prop the reservoir wide open and hang it upside down with the cap off.
- Disconnect the hose and hang it separately so it drains.
- Leave it until it is bone dry inside, which usually takes overnight.
That is the whole preventive routine, and it is where the actual win is. Mould needs moisture. A dry bladder cannot grow anything, no matter how long it sits.
The deep clean, for when it has been neglected
Do this if the bladder has held a sports drink, has been stored damp, or tastes off.
- Fill with hot, not boiling, soapy water or dissolve a cleaning tablet according to its directions. Very hot water can deform the plastic and the fittings.
- Scrub the reservoir with a wide reservoir brush, paying attention to the corners and the seam at the bottom where film collects.
- Run the hose brush through the tube several times, from both ends. This is the step most people skip and it is the one that matters most.
- Disassemble and scrub the bite valve. Most pull apart. This is the single dirtiest component in the system.
- Rinse until you cannot smell or taste soap, then rinse twice more. Soap residue will make every drink taste wrong for weeks.
- Dry completely, propped open, before storage.
Dealing with existing mould
If you can see dark speckling, escalate. Mix roughly a teaspoon of plain unscented household bleach into a litre of water, fill the reservoir, and run some through the hose so the tube is treated too. Leave it about thirty minutes, no longer. Then empty it and rinse very thoroughly, at least three full fills, until there is no chlorine smell at all.
Never mix bleach with vinegar, ammonia, or any other cleaner. Use one or the other. And if a bladder has heavy growth in a seam you cannot reach with a brush, replacing it is a reasonable decision; reservoirs are not expensive relative to the annoyance.
The storage trick that ends the problem
Once the bladder is clean, if you cannot get it perfectly dry, put it in the freezer. Freezing stops biological growth outright, and a damp bladder in the freezer will be fine for months. Take it out the night before a trip. This one habit eliminates almost all bladder cleaning for most people.
Prevention beats cleaning
- Plain water only. Electrolyte powders, sports drinks, and anything with sugar feed the exact organisms you are trying to avoid. Put those in a bottle.
- Do not leave water in it between outings, even for a day or two in a car.
- Rinse the mouthpiece if it has been dragged through dirt or dropped.
- Buy a bladder with a wide opening. A reservoir you can get your hand into is dramatically easier to clean than a narrow screw cap.
That first point is why many hikers settle on a bladder plus a bottle rather than one or the other. It is not redundancy, it is keeping the drink mix out of the thing that is hard to clean. The trade-offs are laid out in hydration bladder vs water bottle, and pack compatibility in our hydration pack guide.
One safety note about the hose
A contaminated hose will recontaminate treated water, which quietly undoes the work of filtering at a stream. If you have been careful about treating water on the trail but casual about the reservoir, you have been solving half a problem. Volume planning and treatment are covered in how much water to carry hiking.
Recommended Gear

- DESIGNED FOR VESTS: This streamlined, lightweight 1.5-liter reservoir is optimized for use in Osprey running and biking …
- SLIDE-SEAL OPENING: Easy Slide-Seal top opening seals watertight and provides wide access for easy filling and cleaning
- EASY ON/OFF: Hydrapak Comet bite valve offers fast, smooth water flow with a thumb-operated, 1/4-twist on/off switch
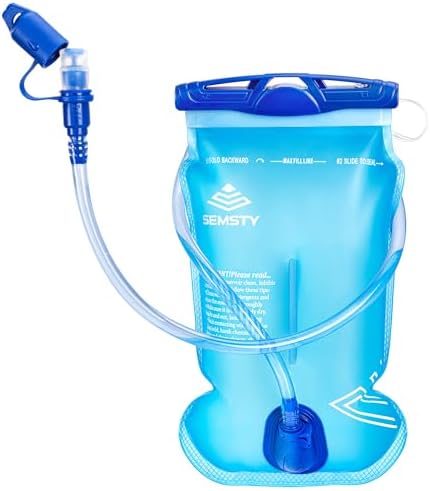
- Premium Quality: Semsty 1.5L water bladder is crafted with high-quality materials which is taste free, BPA free and won’…
- Wide Opening for Easy Cleaning & Fresh Water – The large-mouth opening makes it simple to rinse, refill, and dry thoroug…
- Easy Drinking: The hiking bladder features a soft silicone bite valve for high flow with a pull-to-drink and push-to-loc…

- 【Water Bladder for Hiking Backpack】This 2 liter hydration bladder and 12.59” x 6.69” perfect size is compatible with m…
- 【Say Goodbye to Leaks & Hello to Peace of Mind】This military grade hydration water bag is engineered with cutting-edge l…
- 【Cleaning Made Simple: Spend Less Time Scrubbing, More Time Exploring】 The extra-wide mouth opening allows for effortles…

- Designed for Legacy CamelBak Systems: Compatible with pre 2019 ThermoBak 3L systems and select CamelBak packs, including…
- Rugged Construction for Heavy Use: Radio frequency welded polyurethane reservoir delivers durability and flexibility und…
- One Handed Flow Control: Integrated HydroLock lever allows positive on and off water control, even while wearing gloves
Frequently Asked Questions
Can I use bleach in a hydration bladder?
Yes, in a dilute solution, roughly a teaspoon of unscented household bleach per litre of water, left for about half an hour and then rinsed extremely thoroughly. It is the most effective option for existing mould. Do not mix bleach with anything else, and do not use scented or thickened bleach.
Will vinegar or baking soda work?
They help with odours and light film. Neither reliably kills established mould. Use them for maintenance and save bleach or a purpose-made cleaning tablet for a real problem.
How do I dry the inside?
Prop the reservoir open so air circulates. A dedicated hanger, a whisk pushed inside, or a couple of wadded paper towels all work. Hang it upside down with the cap off and the hose disconnected so water drains out rather than pooling at a fold.
Is the black stuff dangerous?
Black or dark speckling is usually mould, and while a small amount is unlikely to make a healthy person seriously ill, it can cause stomach upset and it tastes terrible. Clean it properly rather than rinsing and hoping.
Can I put a bladder in the dishwasher?
Some manufacturers say yes on the top rack, many say no. Heat can warp the plastic and damage the bite valve. Check your specific model, and when in doubt wash by hand, which is quick anyway.
How do I clean the hose?
You need a long flexible brush. Water alone will not shift the film inside a metre of narrow tubing. A brush kit with a reservoir brush and a hose brush costs very little and is the difference between a clean system and a hose that recontaminates the water.

Written by Jake Miller · Camping & Gear
Jake grew up pitching tents before he could drive and has spent 15+ years camping, car-camping, and gear-testing his way across the country. If it can be cooked over a fire or packed into a trunk, he has an opinion on it.