Heads up: this post contains affiliate links. If you buy through them, WildMorrow may earn a small commission at no extra cost to you. As an Amazon Associate, we earn from qualifying purchases.
⚡ Quick Answer: How to filter and purify backcountry water: filtering vs purifying, squeeze and gravity filters, chemical tablets, boiling and UV, and which method fits your trip.
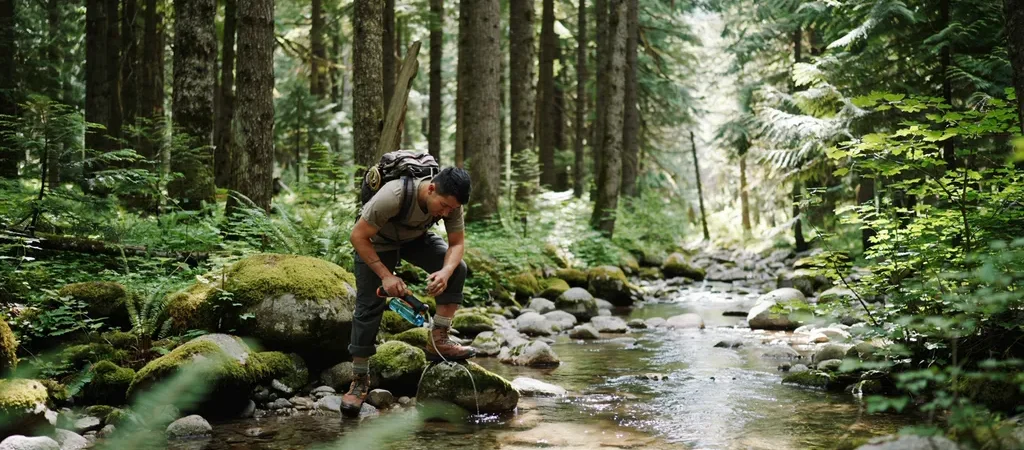
That crystal-clear mountain stream looks pure enough to drink, and that’s exactly how people end up with a week of misery from giardia. Backcountry water can carry protozoa, bacteria, and viruses you can’t see, taste, or smell. The good news: making any water safe to drink is easy, cheap, and light. Here’s how to filter and purify water in the backcountry, and which method fits your trip.
Filter vs purify: know the difference
It matters. A filter physically strains out protozoa (giardia, crypto) and bacteria (E. coli), which covers you across almost all of North America. A purifier also kills viruses via chemicals, UV, or boiling, which matters mostly outside the US or where water is contaminated by human waste. For most US backcountry travel, a good filter is enough; for international trips or questionable sources, add purification.
Method 1: Squeeze and straw filters (the everyday choice)
Lightweight hollow-fiber filters that you squeeze or sip water through are the go-to for hikers and backpackers: cheap, fast, and good for thousands of liters. Screw one onto a bottle or drink straight from the source. This is the filter most people should own.
Method 2: Gravity filters (best for groups and camp)
Fill a bag, hang it, and let gravity do the work while you set up camp, no pumping, no squeezing. Gravity systems shine for families and groups, producing liters of clean water hands-free. Heavier than a squeeze filter, but a luxury at basecamp.
Method 3: Chemical tablets and drops (the featherweight backup)
Purification tablets (chlorine dioxide) kill everything including viruses, weigh nothing, and cost pennies, the perfect backup when a filter clogs or freezes. The trade-offs: you wait 30 minutes to 4 hours, and there’s a faint taste. Every backcountry kit should carry a few as insurance.
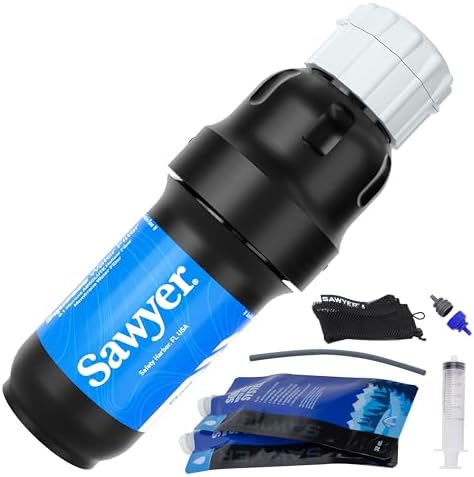
- Lightweight, easy to use portable water filter removes harmful bacteria, protozoa, cysts, sediment, And 100% of micropla…
- High-Performance 0.1 micron absolute inline filter fits in the palm of your hand and weighs just 2 ounces
- 100% of squeeze units individually tested three times to performance standards by sawyer

- High-capacity, gravity-fed, hollow-fiber water filter system is ideal for group and family camping, outdoor adventures, …
- Meets all EPA/NSF guidelines for removal of 99.9999% of bacteria and 99.9% of protozoa, including giardia, cryptosporidi…
- No pumping required; reservoir fills easily and hangs from a tree to deliver four liters of filtered water for cooking a…

- 100% Synthetic
- Made in the USA or Imported
- Water Purification
Method 4: Boiling and UV
Boiling is the original purifier: a rolling boil for one minute (three above 6,500 feet) makes water safe, though it uses fuel and time. UV pens kill microbes with light in clear water for quick, taste-free treatment. Both are solid tools in the kit.
Which should you carry?
Day hikes and most US backpacking: a squeeze filter plus tablets as backup. Group or family trips: add a gravity system. International or sketchy water: filter plus chemical or UV purification. Whatever you choose, treat every backcountry sip, no exceptions, and fold it into the habits in our outdoor safety guide and backpacking guide.
Frequently Asked Questions
What is the best way to purify water in the backcountry?
A hollow-fiber squeeze filter is the modern default: fast, light, and effective against bacteria and protozoa. Pair it with chemical tablets as backup and for viral coverage abroad. Boiling remains the zero-tech, kills-everything fallback.
Do water filters remove viruses?
Most backpacking filters do not — their pores catch bacteria and protozoa but pass viruses. In North America’s backcountry that is rarely an issue; internationally or near heavy human use, add chemical treatment, UV, or boiling after filtering.
How long does boiling water take to make it safe?
One minute at a rolling boil (three minutes above 6,500 feet) kills bacteria, viruses, and protozoa. By the time water reaches a full boil, most pathogens are already dead — the extra minute is insurance.
Written by Sarah Brooks · Hiking & National Parks
Sarah fell in love with the outdoors on a childhood trip to the Smokies and has logged thousands of trail miles across 30+ national parks since. She is happiest above treeline with a map in hand.