
Heads up: this post contains affiliate links. If you buy through one, we may earn a small commission at no extra cost to you. As an Amazon Associate, we earn from qualifying purchases.
⚡ Quick Answer: How to cross a river safely while hiking — how to judge if a crossing is safe, the upstream-facing technique, group crossings, and what to do if you get swept.
Moving water is deceptively powerful: knee-deep current can knock an adult off their feet, and thigh-deep can move a car. River crossings are among the most dangerous moments in backcountry travel — and also among the most manageable, because nearly every drowning follows the same avoidable mistakes. Here’s how to judge a crossing, do it right, and know when to walk away.
First Decision: Should You Cross at All?
- Walk the bank first. Five minutes of scouting upstream and downstream usually finds a better spot — wider, shallower, slower. Wide and braided beats narrow and deep every time.
- Check what’s downstream: never cross above rapids, falls, or strainers (downed trees in current — the deadliest river hazard there is).
- Time it: snowmelt rivers rise through the day and peak late afternoon — cross in the morning. After heavy rain, waiting hours can drop a river dramatically.
- The honest test: if water will be above your knees in strong current, or you can hear boulders rolling, don’t. No destination is worth it.
Prep Before You Step In
- Unbuckle your pack’s hip belt and sternum strap — you must be able to shed it instantly if you go down. A floating pack is replaceable; a pack pinning you under isn’t.
- Keep shoes on. Barefoot on slick rounded rocks is how ankles break. Wear camp sandals or just get the boots wet.
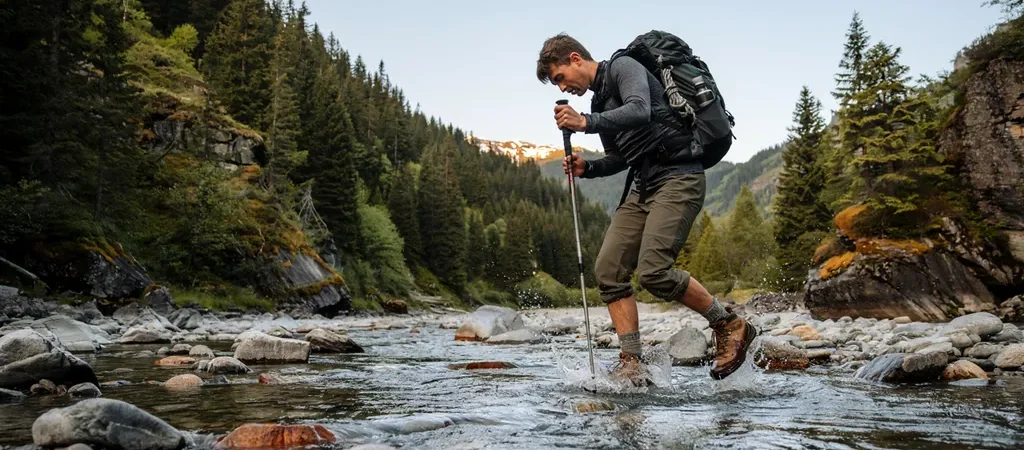
- Use a third leg: a trekking pole or stout stick planted upstream transforms your stability.
- Waterproof the essentials in a dry bag before, not after.
The Crossing Technique
- Face upstream, lean into the current on your pole, and sidestep — never cross your feet.
- Angle your path slightly downstream with the current rather than fighting straight across.
- Move one point of contact at a time: two feet and the pole make a tripod; move only one leg of it.
- Shuffle around, not over, large slick boulders; the gravel between them grips better.
- In groups: link up in a line or triangle, strongest person upstream breaking the current, arms interlocked at the shoulders.
If You Get Swept
- Ditch the pack immediately.
- Float on your back, feet up and pointed downstream — feet act as bumpers, and keeping them high prevents foot entrapment, the classic river killer. Never try to stand in fast current deeper than your knees.
- Backstroke at an angle toward shore; swim aggressively away from strainers — over them if contact is unavoidable, never under.
- Once out: dry clothes and warmth immediately. Cold water steals heat 25x faster than air — see our hypothermia guide.
The strongest river skill is the willingness to turn around — rivers drop, routes reroute, and the trip continues. Pair this with our trekking pole guide (your crossing tool), backpacking basics, and core safety tips.
Recommended Gear


Frequently Asked Questions
When is it safe to cross a river on foot?
When it is knee-deep or less, the current is slow enough that a tossed stick drifts rather than races, and you can see the bottom. Anything past mid-thigh with visible current is a no — the force of moving water doubles quickly with depth.
What is the correct way to cross a river?
Unbuckle your pack’s hip belt, face upstream, and shuffle sideways using a trekking pole or stick as a third leg — two points of contact at all times. Cross at the widest, shallowest spot, never at bends or above rapids.
What should you do if you fall in a river?
Get on your back with feet pointed downstream and toes up, angle toward shore, and ditch the pack if it pulls you down. Do not try to stand in moving water deeper than your knees — foot entrapment is the real killer.
Written by Sarah Brooks · Hiking & National Parks
Sarah fell in love with the outdoors on a childhood trip to the Smokies and has logged thousands of trail miles across 30+ national parks since. She is happiest above treeline with a map in hand.